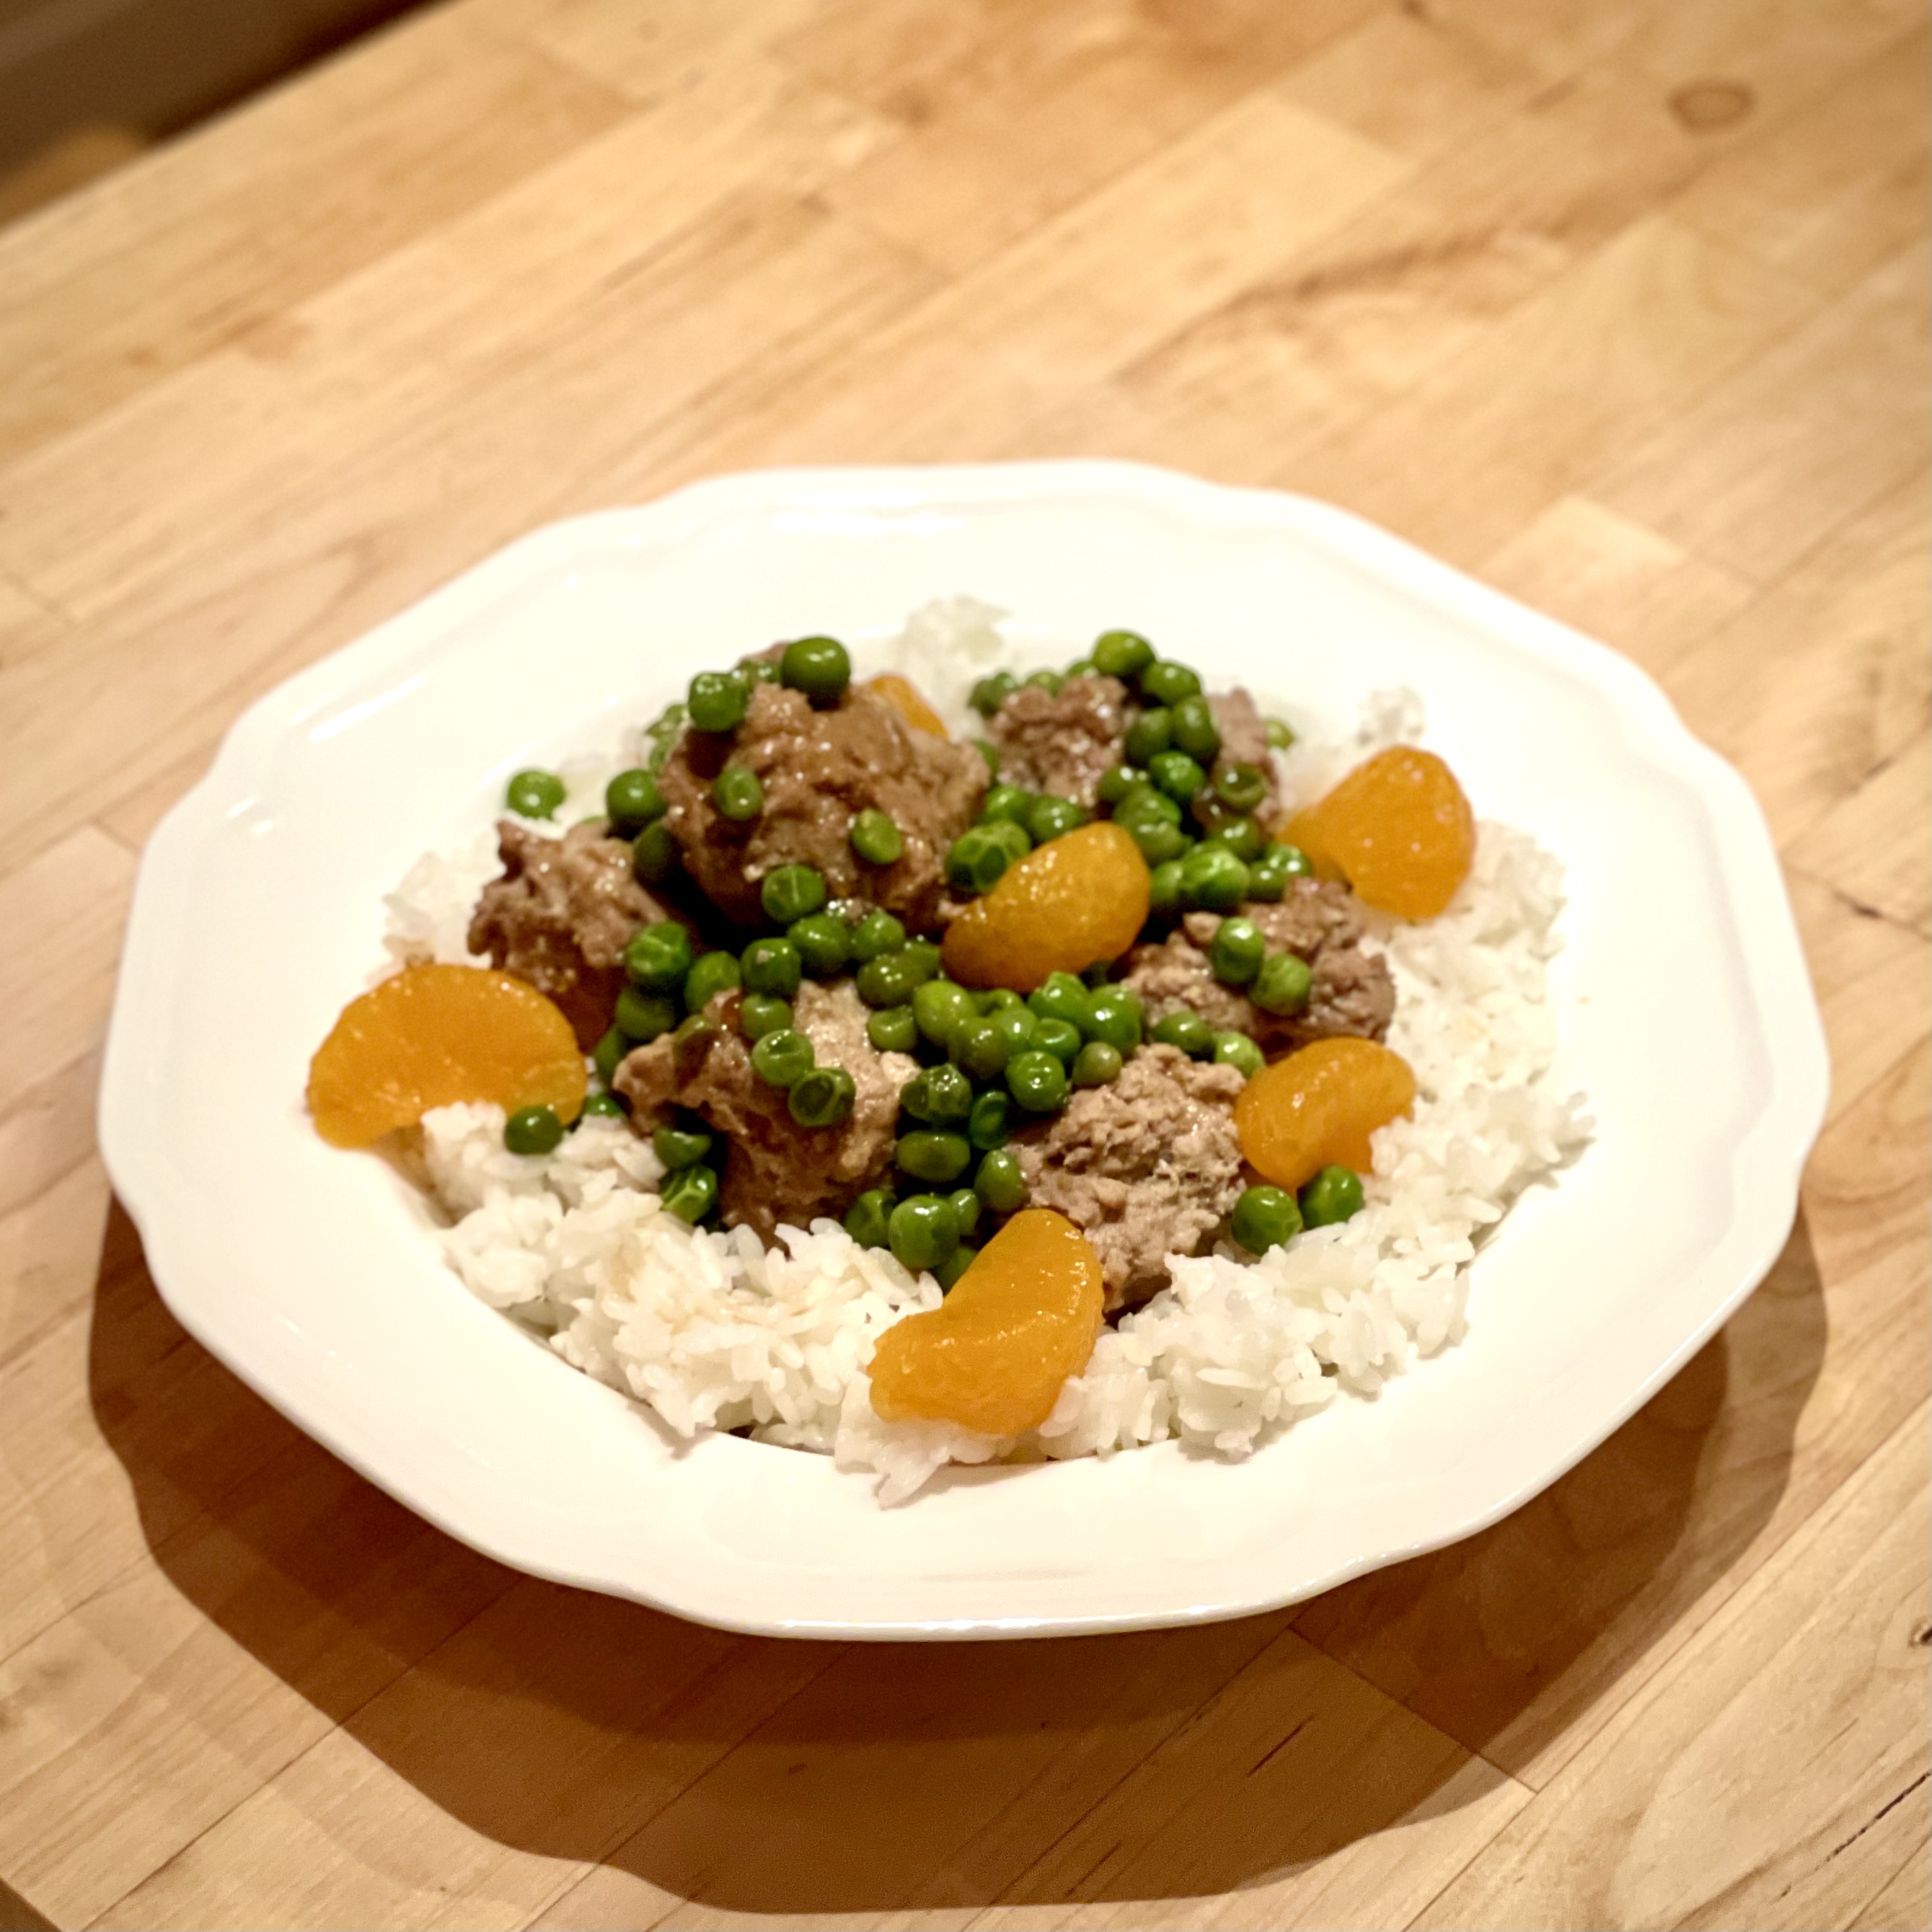
Should have made a half recipe 1.5 lb chick, 6 wings
From kenji
New mar 2022

Used 210 g pork (almost double)
25 g wood ear
25 g lily
1.5 c sauce (plus)
4 green onions
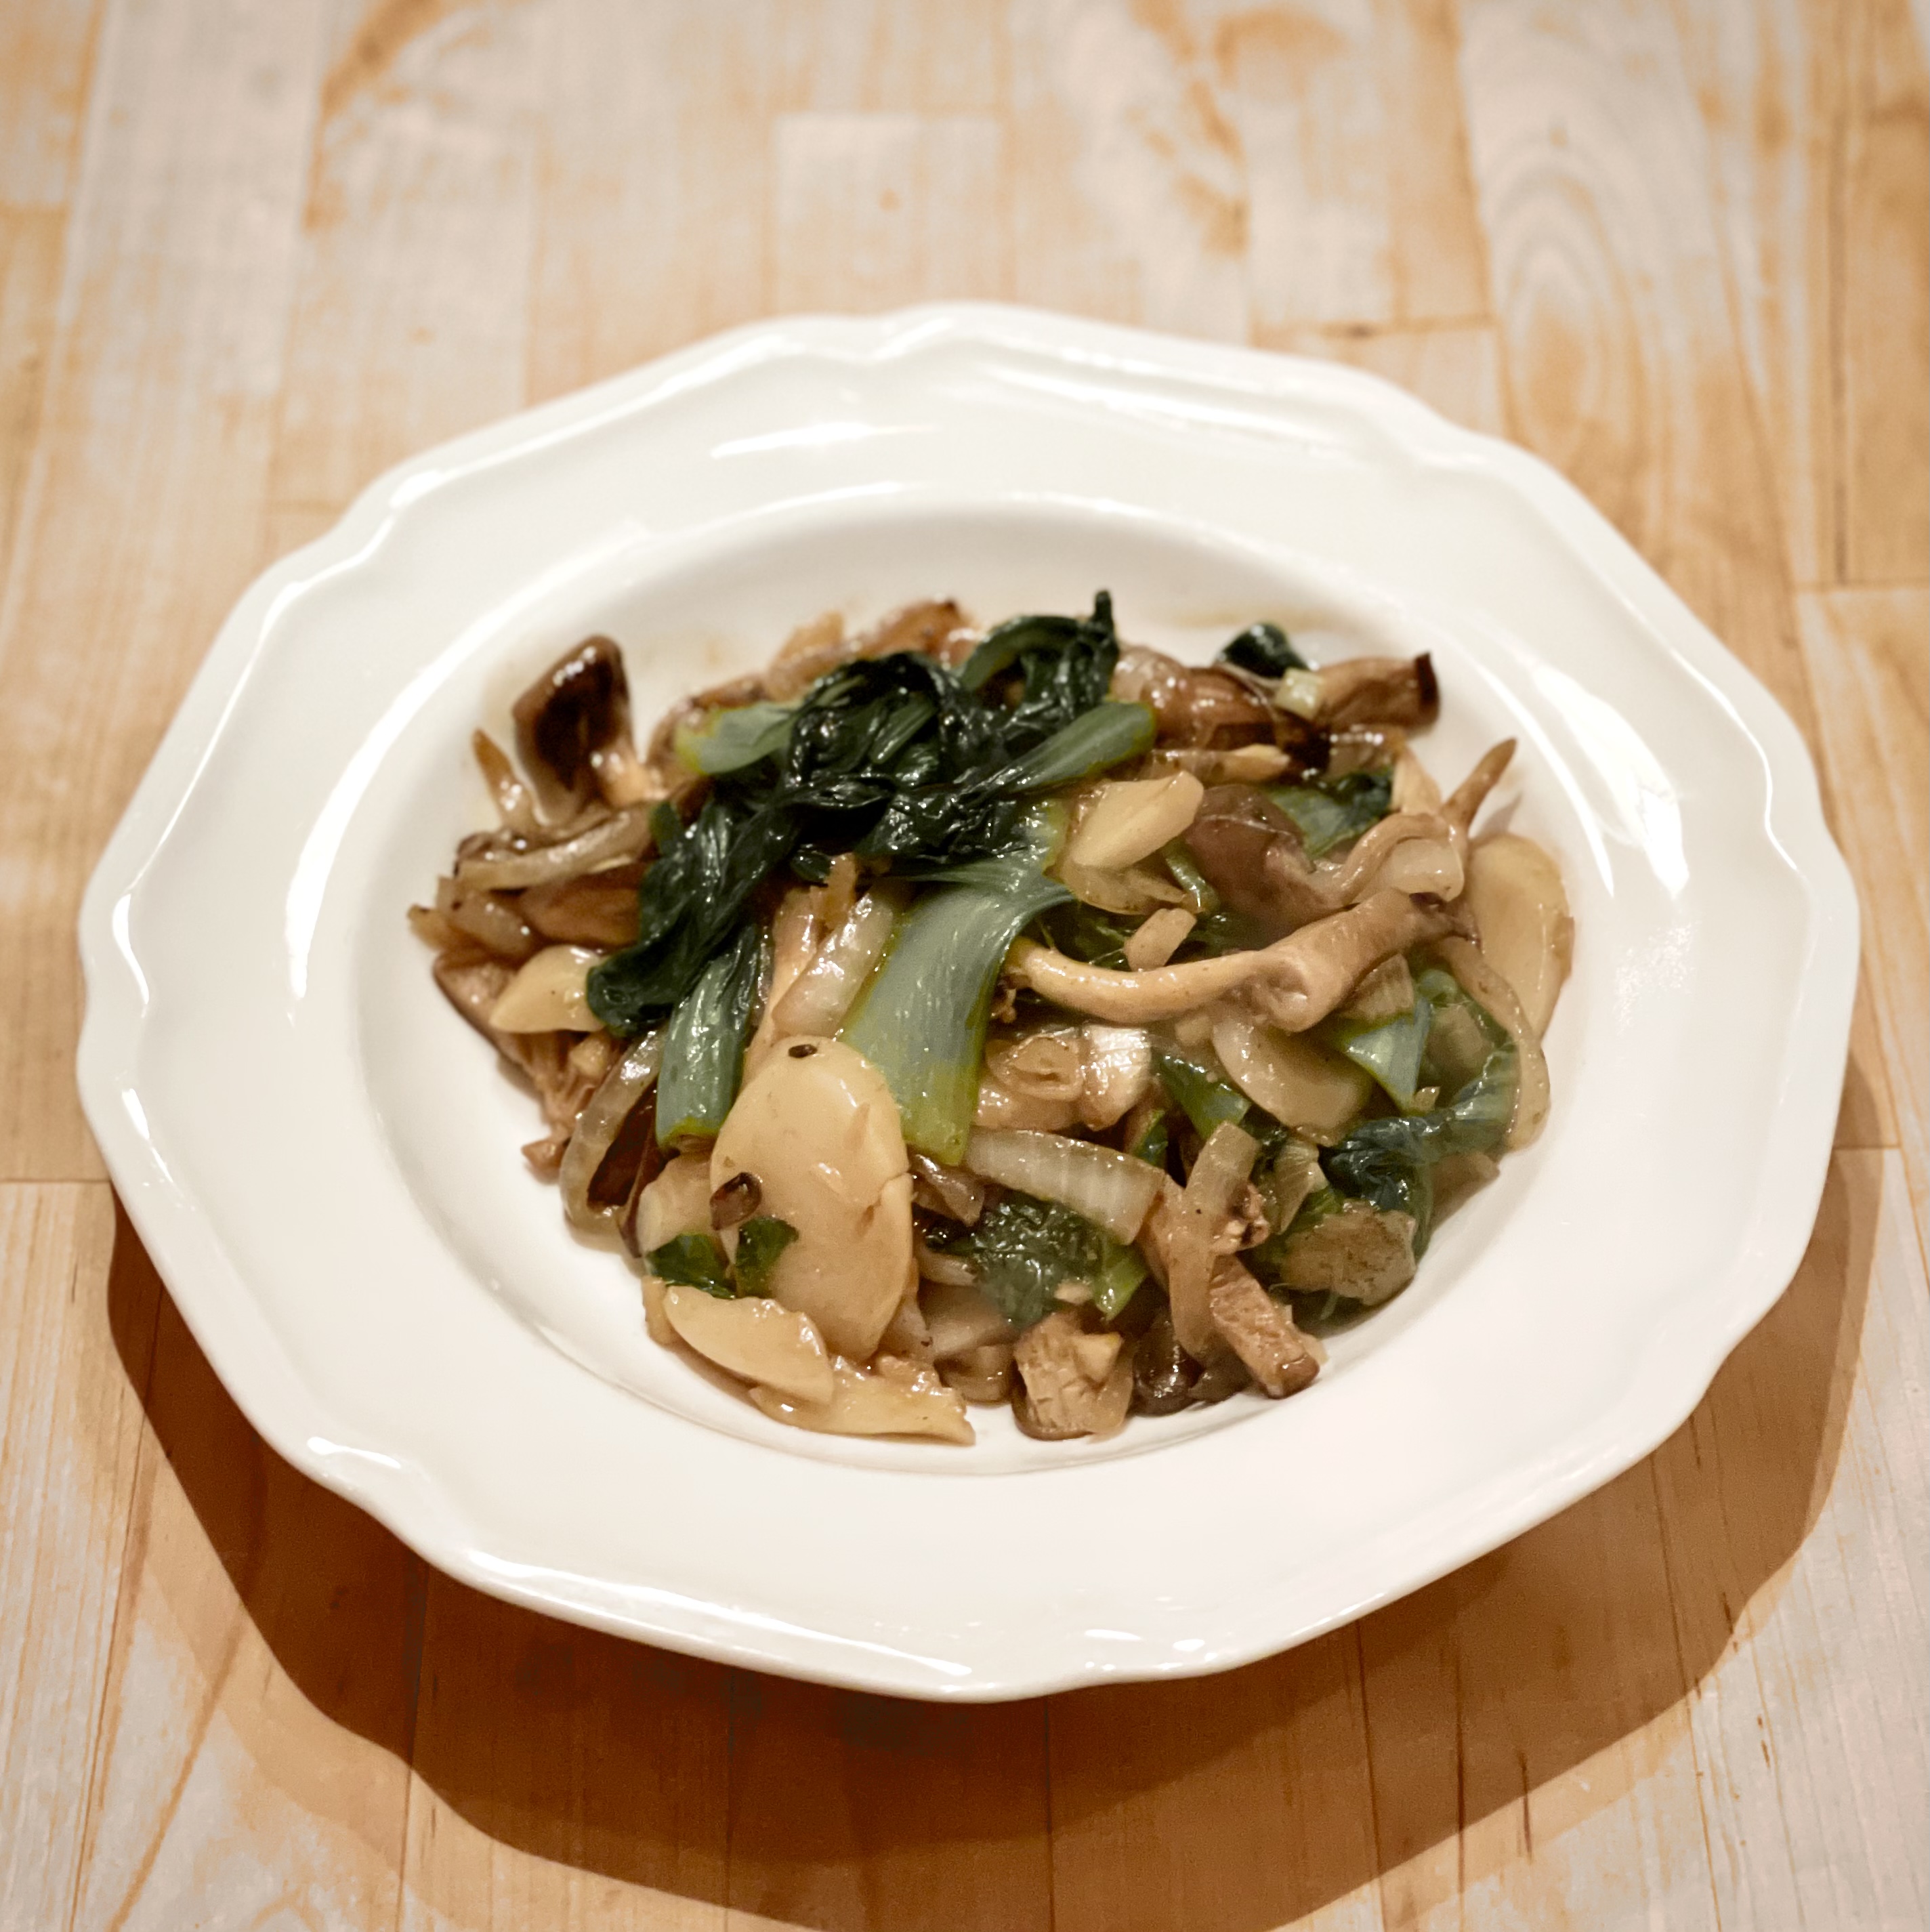
1 pack of mixed mushroom 220g? Mataki mushrooms small trumpet little white capped
99 g shitaki
Next time add some matchstick ginger
Made 2 servings

Traditional Black Beans
Cook first until softened:
Add and cook for 3 minutes
Then add
Serve with rice.

Make them bigger than the original recommended: 2 inch sq instead of 1.5 inch. This means less dough needed
https://www.allrecipes.com/recipe/154920/homemade-manti-traditional-turkish-dumplings/
https://www.sweetpillarfood.com/entrees/manti-with-buttery-tomato-garlic-yogurt/#wprm-recipe-container-5261
https://mission-food.com/homemade-manti/
https://thearmeniankitchen.com/manti-my-christmas-gift-to-my-daughter/


New: January 2022
1 lb ground meat (beef, pork, or veal)
1 sprig fresh flat-leaf parsley, chopped
1 garlic clove, chopped
1 egg, lightly beaten
flour, for dusting
3 tbsp olive oil
1 yellow onion, thinly sliced
2 celery sticks, chopped
2 carrots, chopped
1 spring small fresh rosemary, chopped
1 can of crushed tomatoes (794 g)
1 lb rigatoni (dry)
25g Parmesan cheese, grated
salt and pepper
1. Mix together the minced meat, parsley and garlic in a bowl, then stir in the egg and season with salt and pepper.
2. Shape the mixture into small meatballs, dust with flour and set aside.
3. Heat the oil in a pan, add the onion, celery, carrot and rosemary and cook over a low heat, stirring occasionally, for 5 minutes.
4. Then add the meatballs and increase the heat to medium. Cook until the meatballs are lightly browned all over,
5. add the tomatoes and season with salt. Lower the heat, cover and simmer, stirring occasionally, for about 40 minutes.
6. Cook the rigatoni in a large pan of salted boiling water until al dente, then drain and tip into the pan with the meatballs, Mix well and heat through for 2 minutes.
7. Transfer to a warm serving dish and sprinkle with the Parmesan.
From the silver spoon

Overnight Walnut Wheat Bread
New: Jan 2022
Ingredients
375 g Bread Flour
125 g Whole Wheat Flour
400 g Water Lukewarm (90-95F)
12 g Fine Sea Salt
1/2 tsp Yeast
95 g Walnut Halves
Instructions
Preheat oven to 350 ˚F.
Combine the flour and the water in a big tub and mix to incorporate. Let it sit for about 20-30 minutes.
Spread Walnuts on baking sheet and bake for 5 minutes until lightly toasted. Remove and let cool.
In flour tub, sprinkle the salt and the yeast over the top (but don’t let the yeast and the salt touch directly). Mix it all together with some folds initially, then with the pincer method.
Let it rest for 20 min, then fold.
Rest 20 min, fold.
Rest 20 min, add in cooled walnuts, fold.
Cover and let proof overnight 11-13 hours more (12-14 total). Dough should be at least 2x and up to 3x as large.
Tip the dough out onto a floured surface. Form into a nice ball.
Dust and/or oil a proofing basket or bowl. Place dough ball in each basket.
Cover the bowl with a towel and proof the loaf for another 1 hr 15 minutes.
15 minutes before the loaves are done proofing, preheat an oven to 475 degrees, with a dutch oven inside.
When proofing is done, carefully remove the hot dutch ovens, place a loaf in each, cover, and put them back in the oven. Let cook for 35 minutes covered.
After 35 minutes, remove the top and cook uncovered for another 15 minutes. Very, very, very, carefully tip the loaf out of the dutch oven and let cool for at least 20 minutes.
Originally:
https://www.thecuriouschickpea.com/overnight-artisan-walnut-bread/
https://bakedandchurned.com/overnight-white/
http://www.hintofvanillablog.com/home/2014/01/overnight-white-bread.html
http://210degrees.blogspot.com/2013/10/overnight-white-bread-flour-water-salt.html
https://www.youtube.com/watch?v=MPdedk9gJLQ

More:
1 tablespoon (15ml) extra-virgin olive oil
6 ounces (170g) guanciale, cut into slices about 1/8 inch thick and then into 3/4- by 1/4-inch strips (see note)
Pinch red pepper flakes
One hello onion
1/4 cup (60ml) dry white wine
1 (28-ounce; 794g) can whole peeled tomatoes, crushed by hand
Kosher salt and freshly ground black pepper
1 pound (450g) dried bucatini pasta (see note)
1 ounce (30g) grated Pecorino Romano cheese, plus more for serving
Italian version:
This is a rough translation: Cut guanciale in strips, put it in a pan with nothing else in it, cook it for a few min until it starts to turn golden. Take it out and put it on some paper towel so it get doesn’t get soggy (this is v important!!!!!!!!!!). (You can then strain the little bits of guanciale detritus out of the fat in the pan but I am too lazy for that). Then add the wine to the pan and cook it with the fat until the alcohol evaporates. Then rip up the tomatoes in large pieces and add those to the pan with the peperoncino in flakes (however I usually just leave the peperoncino whole then take it out at the end bc I don’t like this pasta too spicy). Then salt and cook it for around 15 min (I cook it at least until you can see the tomatoes have turned darker) boil pasta separately in salted water a min or two under, add to pan with some pasta water and finish cooking in the sauce then add guanciale and pecorino!
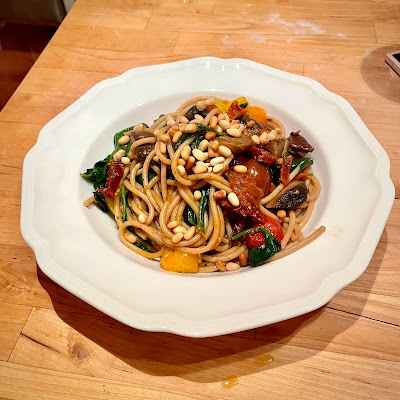
Bucatini all'Amatriciana Recipe
Ingredients
1 tablespoon (15ml) extra-virgin olive oil
6 ounces (170g) guanciale, cut into slices about 1/8 inch thick and then into 3/4- by 1/4-inch strips (can also use pancetta)
Pinch red pepper flakes
1/4 cup (60ml) dry white wine
1 (28-ounce; 794g) can whole peeled tomatoes, crushed by hand
Kosher salt and freshly ground black pepper
1 pound (450g) dried bucatini pasta (see note)
1 ounce (30g) grated Pecorino Romano cheese, plus more for serving
Directions
In a large skillet, heat olive oil over medium-high heat until shimmering. Add guanciale and pepper flakes and cook, stirring, until lightly browned, about 5 minutes. Add wine and cook, scraping up any browned bits on bottom of pan, until nearly evaporated, about 3 minutes.
Add tomatoes and bring to a simmer. Season with salt and pepper.
Meanwhile, boil pasta in salted water until just shy of al dente, about 1 minute less than package recommends. Using tongs, transfer pasta to sauce, along with 1/4 cup pasta cooking water. Cook over high heat, stirring and tossing rapidly, until pasta is al dente and sauce has thickened and begins to coat noodles. Remove from heat, add cheese, and stir rapidly to incorporate. Season to taste with more salt and pepper. Serve right away, passing more cheese at the table.

Pancakes
¾ cup milk
2 tablespoons white vinegar
1 cup all-purpose flour
2 tablespoons white sugar
1 teaspoon baking powder
½ teaspoon baking soda
½ teaspoon salt
1 egg
2 tablespoons butter, melted
Step 1
Combine milk with vinegar in a medium bowl and set aside for 5 minutes to "sour".
Step 2
Combine flour, sugar, baking powder, baking soda, and salt in a large mixing bowl. Whisk egg and butter into "soured" milk. Pour the flour mixture into the wet ingredients and whisk until lumps are gone.
Step 3
Heat a large skillet over medium heat, and coat with cooking spray. Pour 1/4 cupfuls of batter onto the skillet, and cook until bubbles appear on the surface. Flip with a spatula, and cook until browned on the other side.
originally from:
https://www.allrecipes.com/recipe/162760/fluffy-pancakes/

chinese donut
you tiao
youtiao
2 cups all-purpose flour
1 egg
1/2 teaspoon salt
1½ teaspoons baking powder
1 tablespoon milk
2 tablespoons unsalted butter (softened, NOT MELTED)
about 1/3 cup water (the exact amount changes based on the humidity in your kitchen; the dough should be very soft, but not sticking to the mixing bowl)
oil (for frying)
1. Using your electric mixer with the dough hook attachment, first mix the flour, egg, salt, baking powder, milk, and softened butter together on the lowest setting. Keeping the speed at “stir,” slowly add the water in a few separate batches (you may need more or less depending on the humidity in your kitchen).
2. Knead the dough for 15 minutes. The dough should be sticky, but not stick to the sides of the bowl. Cover the dough, and let rest for 30 minutes. This can be done by hand if you don’t have a mixer. Just knead the dough for 5-10 minutes longer.
3. On a clean, lightly floured surface, form the dough into a long flat loaf shape, about 1/4-inch thick and 4 inches wide. Take the time to make it truly uniform. Place it in the center of a large piece of plastic wrap on a baking sheet or long, flat plate. Wrap the dough, tucking the two ends of the plastic under the loaf, and ensuring that the dough is completely covered. Refrigerate overnight.
In the morning, take out the dough and let it sit on the counter (wrapped) for 1-3 hours until the dough is completely back to room temperature and VERY, VERY soft to the touch. This step is critical, and may take longer in the colder months. If you don't let the dough come back to room temperature, it won't fry up properly.
4. Now prepare the oil for frying using your wok. You can also use a large pan with some depth for added safety. The goal is to have a large vessel, so that you can produce authentically long crullers. Use medium heat to slowly bring the oil up to 400-425°F/205-220°C.
While the oil is heating up, you can unwrap the dough. Gently flip the dough onto a lightly floured surface, peeling off the plastic wrap. Very lightly flour the top side of the dough also. Next, cut the dough into 1-inch wide strips (try to cut an even number of strips). Then stack them two by two, and press the center, lengthwise, with a chopstick. Hold the two ends of each piece, and gently stretch the dough to a 9-inch long rope.
5. Once the oil is up to temperature, carefully lower the stretched dough into the oil. If the oil temperature is right, the dough should surface right away. Now take a long cooking tool (we used chopsticks, but you could also use tongs), and quickly roll the dough in a continuous motion for about a minute.
6. You can fry one to two at a time. Just be sure to take the time to continuously roll the dough in the oil. The youtiao is done once they turn light golden brown. Try not to over-fry them as they become unpleasantly crunchy rather than chewy and delicious.
Now, repeat those steps with the remaining dough. You might want two people manning the process—one to form and place the dough into the fryer and one to roll the dough around once it’s in the oil.
originally from: https://thewoksoflife.com/youtiao-recipe/


new: April 2020
originally from: https://www.seriouseats.com/basic-neapolitan-pizza-dough-recipe
Mille Feuille
New: November 2021

Ingredients
For the Pastry Cream
2 cups whole milk 473mL
1/2 vanilla bean split lengthwise
6 egg yolks
2/3 cup sugar 135g
1/4 cup cornstarch 37g
1 tbsp unsalted butter 15g, cold
For the Pastry
1 package frozen puff pastry (need to thaw in fridge for at least 2-3 hours)
For the Icing
3 cups powdered sugar
2 tsp vanilla
1/4 cup milk
1/4 cup cocoa powder
Instructions
For the Pastry Cream
Slice a vanilla bean down the middle and use a spoon to scrape out the seeds.
Transfer the milk and vanilla seeds to a medium pot and place over medium-high heat.
Bring to a boil whisking occasionally then immediately turn off the heat and set aside to infuse for 15 minutes.
In a bowl, whisk the sugar and corn starch together then add the egg yolks and whisk until light and fluffy.
Whisk in 1/4 cup of the hot milk mixture until incorporated. Whisk in the remaining hot milk mixture, reserving the saucepan.
Pour the mixture through a strainer back into the saucepan. Cook over medium-high heat, whisking constantly, until thickened and slowly boiling.
Remove from the heat and stir in the butter. Let cool slightly.
Cover with plastic wrap, lightly pressing the plastic against the surface to prevent a skin from forming.
Chill at least 2 hours or until cooled.
For the Pastry Layers
Preheat oven to 400F.
Measure first! This recipe makes about 9 pastries so that means you need 27x rectangles
Roll out to about 1/16 an inch then use a knife or pizza cutter to cut 2x4 inch rectangles.
Line a baking sheet with parchment paper then place the first batch of rectangles about 2 inches apart. Place another sheet of parchment on top then cover with another baking sheet.
Bake for about 11 minutes rotating tray halfway through. Remove from oven and transfer to a wire rack to cool. Repeat process with 1/2 of the remaining sheet of puff pastry for the additional rectangles. You can clean up the edges with a sharp knife if desired.
For the Glaze
Add the powdered sugar to a large bowl then pour in the vanilla extract and 3 tablespoons of milk whisk together and add more milk as needed. You want a spreadable consistency but not a watery "flooding" consistency.
Transfer about 1/3 cup of the glaze to a different bowl and add the cocoa powder an another tablespoon of milk. Whisk together until smooth. Add more milk as needed so the chocolate glaze matches the vanilla glaze in consistency.
Transfer each batch of icing to a piping bag. You can use a small round tip like a #4 for the chocolate or just snip the tip off.
For the Assembly
Lay out 9 rectangles onto a wire rack over a piece of paper. Spread the vanilla icing onto each rectangle then pipe stripes of chocolate onto each one. Use a toothpick, skewer, or knife to create the chevron pattern by dragging the tool across the chocolate stripes in alternating directions. Set aside to set.
You can speed things up by arranging the tops in a grid where they're all touching then pipe the chocolate and create the chevrons.
Whip the cream and powdered sugar together until somewhat stiff peaks form. Whip the chilled pastry cream to break it up and smooth it out
Pipe 8 dollops of pastry cream onto the first piece of puff pastry. Place another piece of pastry on top then pipe eight more dollops and add the top on.
Originally from: https://preppykitchen.com/mille-feuille/
Squid Ink Pasta Sauce
new: dec 2021

Olive oil in hot pan
Add two thinly sliced onions, cook at low heat
Chop 4-8 garlic cloves, add to pan
Cook on low
Add 2-3 chopped heirloom tomatoes (small)
Add 1 heaping Tb of tomato paste
Add dash of chili flakes
Add large splash of heavy cream
Add 250 g of cooked squid ink pasta
Add half lemon of juice
Serve with cooked shrimp, scallops, salmon or mix
melody recipe


Ingredients
1 (15 oz) can cooked chickpeas (OR 1 heaping half cup dried soaked overnight)
4 tablespoons chickpea liquid from can
2 garlic cloves
2 teaspoons of roasted garlic
1 teaspoon ground cumin
2 tablespoons lemon juice
2 tablespoons tahini paste
¼ cup olive oil
½ cup Greek yogurt
Salt to taste
Garnish: olive oil, sumac, olives, chickpeas
Instructions
Pulse the garlic cloves in the food processor until finely chopped.
Add the chickpeas and pulse until crushed.
Add the remaining ingredients and puree until smooth.
Taste and adjust seasoning if needed.
Transfer to a serving dish and garnish with a drizzle of olive oil, chickpeas, and some olives. Sprinkle with sumac and serve with veggies, pita chips, or breadsticks.
Notes
Store leftover hummus in an airtight container in the refrigerator for up to 5 days.
Originally from: https://www.dimitrasdishes.com/creamy-greek-style-hummus-with-yogurt/
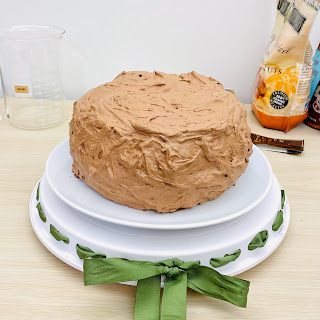
Emoji Cake

Japanese Strawberry Cake
Japanese Strawberry Sponge Cake (Strawberry Shortcake)
Prep Time
40 mins
Cook Time
25 mins
Sponge Cake Cooling Time
1 hr
Total Time
2 hrs 5 mins
Japanese sponge cakes have in general lighter and softer texture than those I find in Australia, and possibly other Western countries. The texture is almost like my Cotton Cheesecake. The most popular sponge cake in Japan is by far the Strawberry Sponge Cake, aka Strawberry Shortcake.
Recipe Type: Dessert
Cuisine: Japanese
Keyword: japanese cake, sponge cake, strawberry cake
Serves: 8
Author: Yumiko
Ingredients (tbsp=15ml, cup=250ml)
Sponge Cake
125g / 4.4oz all-purpose flour sifted 3 times
100g / 3.5oz sugar (note 1)
4 eggs , yolks and whites separated
60g / 2.1oz butter , melted
Butter and flour to coat inside the cake pan
Decoration
18 strawberries (mid-size, note 2)
300ml / 0.6pt cream for whipping (note 3)
10g / 0.4oz sugar
Syrup (optional, note 4)
40ml / 1.4oz water
10g / 0.4oz sugar
Instructions
Pre-heat oven to 180°C / 356°F.
Coat the inside of an 18cm / 7" cake tin (note 5) with butter, dust with flour, then shake off the excess flour.
Put the egg yolks in a bowl, add ⅔ of the sugar and beat the egg yolks until they become whitish and thick. Draw a ribbon with the whisk and if the ribbon disappears slowly, it is ready.
In a separate bowl, beat the egg white. When the small bubbles form and the volume of the egg white doubles, add the remaining sugar in 2-3 batches and beat further to make meringue.
When the meringue becomes firm and it can form a peak when you lift the whisk (see the step-by-step photo in the post), it is ready.
Put the flour through the sifter and add to the egg yolk. Fold the batter with a spatula.
Transfer ⅓ of the meringue to the batter and mix with a whisk until the batter becomes smooth.
Add the remaining meringue to the batter in 2-3 batches and fold.
Pour the melted butter into the batter and fold several times. It's OK even if the butter is not completely mixed.
Pour the batter into the cake tin. Drop the tin onto the work bench to settle the batter in the tin, then, cook in the oven for 25 minutes. Insert a thin bamboo skewer in the centre of the cake to see if the skewer comes out dry. If the skewer is a bit wet, cook further 5 minutes.
Take the tin out of the oven and drop the tin onto the work bench. Remove the cake from the tin and let it cool completely on a rack, upside down (bottom side up).
Decorating the cake (do the steps 1 and 2 while cooling the sponge cake)
Put the Syrup ingredients in a small saucepan and bring it to a boil. When the sugar dissolved, turn the heat off.
Whip the cream until soft peak forms. Wipe the strawberries with a wet kitchen paper, remove the stems and halve 10 strawberries.
Leave the sponge cake upside down as is and slice it horizontally in half (note 6), remove the top half and place it next to the bottom half of the cake, cut side up.
Using a brush, coat the cut surface of the two sponge cakes with the syrup gently.
Drop about 3 heaped tablespoons of the whipped cream on the bottom half of the sliced cake and spread it to cover the entire surface. Fill the surface with the halved strawberries, without a gap as much as possible.
Drop about 4 heaped tablespoons of the whipped cream on and spread it to cover the strawberries and the round edge.
Place the top half of the cake on it, syrup side down. Gently press down, making sure the top and bottom cakes are aligned. Fill the gap around the strawberry filling on the side with whipped cream.
(optional) Thinly coat the top and the side of the cake with whipped cream. It is OK not to completely cover the sponge. Leave the cake in the fridge for 10 minutes (note 7).
Using a cake spatula or a long flat spatula, fully cover the top and the side of the cake with the remaining whipped cream, leaving some (about minimum of 4-5 tablespoons) for piping.
Put the remaining cream in a piping bag with a round nozzle. Squeeze out the cream to make a mound of cream in 8 positions around the edge of the surface. Place a strawberry on each mound.
Recipe Notes
1. My cake is not too sweet. If you prefer it sweeter, increase the quantity of sugar up to 125g / 4.4oz.
2. My 18 strawberries weighed about 450 / 1lb. I used halved strawberries as fillings but if you slice them, you can reduce the number of strawberries.
Instead of strawberries, you can use other berries to make it a mixed berry shortcake (see the photo in the post), or different fruits such as sliced peaches, kiwifruits, pineapples, oranges, grapes, or all of these mixed together!
3. Amount of whipped cream varies depending on the size of the cake tin, how tall your cake is and how much cream you put on the cake.
4. I did not use it but you can add a small amount (½ teaspoon) of liquor of you choice if you want.
5. I tried with a springform cake tin as well as a non-springform tin. The springform tin leaves a dent at the bottom of the cake when cooked so, I prefer a non-springform tin. There is no problem removing the baked cake out of the non-springform tin.
The size of the tin can be up to 21cm / 8". Any larger than that will make the cake thin, and it will not be easy to slice into two layers.
6. The easiest way to slice the round cake horizontally is to make a shallow cut around the side of the cake first, then slide the knife deeper into the centre ensuring that the blade traces the initial cut.
7. This will make the remaining whipped cream stick easier, particularly on the side.
8. My method of making a sponge cake is to beat the egg yolks and whites separately. There is another method of making the batter by beating whole eggs. If you want to use this method, here are the steps to replace the steps 3-9 in my recipe:
1) Put the eggs in a bowl, mix, then add sugar. Beat the eggs over a 60°C / 140°F water bath.
2) When the egg mixture is warmed up to around body temperature, remove the bowl from the water bath.
3) Continue to beat until the egg mixture cools down and becomes thick whitish batter. When you draw a ribbon with the whisk, the trace of the ribbon should slowly disappear.
4) Add the flour through a sifter to the batter and fold it in with a spatula. Add butter and fold several times.
9. You should consume the cake within 2 days. Although the sponge cake will keep longer, the flavour of the strawberries and cream start degrading on 3rd day.
10. Nutrition per serving.
serving: 146g calories: 346kcal fat: 22g (34%) saturated fat: 13g (65%) trans fat: 0.7g polyunsaturated fat: 1.4g monounsaturated fat: 6g cholesterol: 152mg (51%) sodium: 95mg (4%) potassium: 151mg (4%) carbohydrates: 31g (10%) dietary fibre: 1.2g (5%) sugar: 18g protein: 6.2g vitamin a: 18% vitamin c: 40% calcium: 3.8% iron: 7.6%
Originally from: https://japan.recipetineats.com/japanese-strawberry-sponge-cake-strawberry-shortcake/

New: Oct 2021
INGREDIENTS
2 tablespoons butter
2 tablespoons extra-virgin olive oil
4 garlic cloves, minced
½ cup dry white wine or broth
¾ teaspoon kosher salt, or to taste
⅛ teaspoon crushed red pepper flakes, or to taste
Freshly ground black pepper
1 ¾ pounds large or extra-large shrimp, shelled
⅓ cup chopped parsley
Freshly squeezed juice of half a lemon
Cooked pasta or crusty bread
PREPARATION
In a large skillet, melt butter with olive oil. Add garlic and sauté until fragrant, about 1 minute. Add wine or broth, salt, red pepper flakes and plenty of black pepper and bring to a simmer. Let wine reduce by half, about 2 minutes.
Add shrimp and sauté until they just turn pink, 2 to 4 minutes depending upon their size. Stir in the parsley and lemon juice and serve over pasta or accompanied by crusty bread.
Originally from: https://cooking.nytimes.com/recipes/9101-classic-shrimp-scampi

Used 1.2 kg of wings and 4 t of baking powder.
Next time 2 lbs of chicken probably enough.
https://www.recipetineats.com/crispy-oven-baked-chicken-wings-honey-garlic-sauce/#wprm-recipe-container-20701


1 lb Chinese or Korean Rice Cake - 450 gr
2 Tbsp cooking oil - divided
3 cloves garlic - finely chopped or grated
1 lb baby bok choy - 450 gr (suggest 600 g)
1/4 cup chicken broth (or shiitak water)
Added: ginger, shiitakes, one yellow onion
Seasonings:
2 Tbsp soy sauce dark
2 Tbsp oyster sauce
1 Tbsp shaoxing wine
1 tsp black vinegar
1/2 tsp sugar
white pepper
Can add less salt, leave out sugar
If you get the refrigerated rice cakes or dried rice cakes, soak them in the water for at least 2 hours (overnight for dried rice cakes). If you use frozen ones, thaw in the refrigerator and then soak
Drain off the soaking water and the rice cakes are ready to be used
1. Preheat a large skillet or wok over high heat. Add 1 Tbsp cooking oil and swirl to cover the base of the skillet or wok. Add chicken and stir fry until the chicken pieces turn opaque and cook through. Dish out the cooked chicken
OR
Add tofu/soaked shiitake mushrooms
2. Wipe the wok clean if necessary. Bring the skillet/wok back to high heat. Add another 1 Tbsp of cooking oil. Add garlic and stir fry for about 20 seconds. Add the bok choy and stir fry another minute
3. Add rice cakes, seasonings, and broth. Give them a quick stir. Cover with a lid and cook for about 3 minutes or until the rice cakes soften
4.Uncover the lid and give it a good stir to mix everything. Add the chicken/mushrooms/tofu back into the skillet/wok and give it a stir.
Garnish with chopped green onion and serve warm
https://drivemehungry.com/stir-fried-shanghai-rice-cakes-chao-nian-gao/
https://whattocooktoday.com/stir-fried-nian-gao-rice-cakes.html

Sheet Pan Tandori Chicken
INGREDIENTS
5 tablespoons organic canola oil
4 cloves garlic, minced
2 tablespoons grated fresh ginger
1 tablespoon chili powder
1 tablespoon garam masala
2 teaspoons ground cumin
2 teaspoons paprika
1 teaspoon ground turmeric
1 cup plain whole-milk yogurt
2 tablespoons fresh lime juice
1 jalapeño pepper, seeded and finely chopped
Kosher salt
Freshly ground black pepper
2 pounds bone-in, skin-on chicken parts (a mix of breasts, split and cut in half, thighs, and legs)
3/4 pound Yukon Gold potatoes, cut into 1-inch pieces
4 cups 1-inch cauliflower florets
4 cups 1-inch broccoli florets
8 small cremini mushrooms, stems trimmed
1/2 teaspoon fenugreek seeds or cumin seeds
1/2 cup red onion, halved lengthwise, then sliced into thin half-moons
Mango Chutney (homemade or your favorite store-bought chutney)
PREPARATION
In a small skillet over medium heat, heat 2 tablespoons of the canola oil. Add the garlic and ginger and cook, stirring continuously, until light brown and fragrant, about 1 minute. Add the chili powder, garam masala, 1 teaspoon of the cumin, the paprika, and turmeric and cook, stirring continuously, for an additional minute. Set aside to cool.
In a large bowl, combine the yogurt, lime juice, jalapeño pepper, 2 teaspoons salt, 1/8 teaspoon black pepper, and the spice mixture and stir to combine.
Using a sharp knife, score the skin of each piece of chicken, making two or three shallow cuts about 1 inch apart. Add the chicken and potatoes to the bowl with the spiced yogurt and massage the yogurt into the chicken until all the pieces are well coated. Transfer the chicken, potatoes, and spiced yogurt to a large zip-top freezer bag and set aside for 30 minutes at room temperature or refrigerate for up to 8 hours.
Set a rack in the upper-third of the oven and preheat the oven to 425°F.
Place the cauliflower, broccoli, and mushrooms in a large bowl. Add the remaining 3 tablespoons canola oil, remaining 1 teaspoon cumin, the fenugreek seeds, 1/2 teaspoon salt, and 1/8 teaspoon black pepper and mix well.
Remove the marinated chicken from the bag, letting any excess marinade drip off, and arrange the pieces skin-side up on a rimmed baking sheet. Scatter the potatoes in and around the chicken. Roast for 20 minutes, then remove the pan from the oven and place the vegetables in a single layer in any spaces around the chicken. Return the pan to the oven and roast for an additional 20 minutes. Remove from the oven and switch the oven to broil.
Sprinkle the red onion over the chicken and vegetables, return the baking sheet to the oven, and broil until the chicken is lightly charred and crispy, 2 to 3 minutes. Remove from the oven and serve with mango chutney, if desired.
from: https://www.epicurious.com/recipes/food/views/tandoori-chicken-and-vegetable-sheet-pan-supper
New Joe's
Joe's Special (Scrambled Eggs with Spinach, Beef, and Mushrooms)
PREP TIME 10 mins
COOK TIME 30 mins
TOTAL TIME 40 mins
SERVINGS 4 to 6 servings
Ingredients
2 tablespoons unsalted butter
8 ounces crimini mushrooms, sliced
1 medium yellow onion, diced
4 cloves garlic, chopped
1 teaspoon salt, divided
6-ounce bag (8 cups) baby spinach
1 pound (85 to 95%) lean ground beef (use turkey instead of beef)
1 teaspoon Worcestershire sauce
1/4 teaspoon ground black pepper
1/8 teaspoon ground nutmeg
6 large eggs
1 teaspoon Tabasco sauce, optional
Sliced sourdough bread or rolls, to serve
Method
Cook the mushrooms, if using:
Melt the butter in a large (12-inch) skillet over medium heat. Add the mushrooms into the skillet in a single layer and leave them alone, without stirring, until they begin to brown, about five minutes.
Cook the onions:
Add the onions, garlic, and 1/2 teaspoon of the salt to the mushrooms. Cook, stirring occasionally, until the onions are softened and the garlic has lost its raw bite, about five more minutes.
Wilt the spinach:
Add the spinach to the skillet, stirring it into the other ingredients for a couple minutes so that it wilts and reduces in volume.
When the spinach has just barely wilted, transfer everything from the skillet to a large, shallow serving bowl.
Cook the ground beef:
Add the ground beef to the empty skillet over medium heat. Sprinkle the Worcestershire sauce, pepper, nutmeg, and remaining 1/2 teaspoon of salt over top. Cook the beef, breaking it up with your spatula into crumbles.
Continue to cook until the beef is fully cooked through with no trace of pink remaining, 8 to 10 minutes.
Transfer the cooked beef to the serving bowl with the sautéed vegetables. Pour off any fat still in the pan, leaving just a thin film to cook the eggs. (Add a teaspoon of cooking oil or butter if the pan seems dry.)
Scramble the eggs:
Return the pan to the stove and reduce the heat to medium low. In a medium mixing bowl, whisk the eggs with tabasco, just until thoroughly combined.
Pour the eggs into the skillet, and scramble just until the curds are barely wet and beginning to break apart, stirring often, about five minutes.
Mix everything together and serve:
Add the cooked beef and vegetables back to the skillet, breaking up the eggs into bite sized pieces and stirring everything together until evenly combined.
Transfer everything back to the serving bowl and serve hot, with sourdough bread alongside.
originally from: https://www.simplyrecipes.com/recipes/joes_special_scrambled_eggs_with_spinach_beef_and_mushrooms/


Aloo Palak
New: November 2020
INGREDIENTS
1 pound (16-oz package) of prewashed organic baby spinach OR 2 small organic bunches of spinach (500 grams), washed, rinsed, and stems removed fresh or frozen
2 large russet potatoes (300 grams) peeled and cubed
1/4 cup neutral oil such as grapeseed or avocado
1 tbsp ghee (or sub butter) optional
2.5 tsp cumin seeds
1 medium onion finely chopped
2 green chili peppers slit in half
4 cloves garlic crushed
1/2 inch piece ginger crushed
2 medium to large tomato finely chopped (about 170 grams)
2 tsp coriander powder
1 tsp cumin powder
1 tsp turmeric powder
1/4 tsp red chili powder
¾-1 tsp salt or to taste
1 tsp garam masala optional
1 tsp freshly squeezed lime or lemon juice
INSTRUCTIONS
Finely chop the spinach leaves using the pulse function of a food processor*. You can do this in advance and store it, covered, in the refrigerator. Set aside.
Boil** the cubed potato with 1 tsp salt until tender. Drain and set aside.
Meanwhile, heat oil and ghee in a large pan over medium-high heat and add the cumin seeds. Give them a few seconds to sizzle. Add the onion and cook, stirring often, until slightly golden, about 5-7 minutes. Add the slit green chili pepper, garlic, and ginger and cook until the raw smell disappears, about 20 seconds. Add the chopped tomato, spice powders (except garam masala), and salt. Cook until the tomato becomes soft and the oil starts to leave the sides, about 3 minutes.
Raise the heat to high and add the spinach. Stir-fry it until it loses its moisture, about 10 minutes. Add water as needed to prevent the spinach from sticking to the bottom. If you feel that it still isn't cooked, add 1/4 cup of water, cover, and cook on low-medium heat for an additional 5 minutes. When the spinach is cooked, add the boiled potatoes and stir to coat the potatoes with the spinach. Add garam masala and more salt, if needed. Turn off the heat and sprinkle lime or lemon juice.
Serve hot with roti, naan, ricerice or bread. You can also serve yogurt and chopped red onions on the side, if desired.
*I use the pulse function to chop the onion and tomato as well.
**To boil the potatoes: place the potatoes in a saucepan and cover with a couple inches of water. Stir in salt. Bring to a boil, then reduce to a simmer. Check the potatoes for doneness in about 10 minutes. When they are tender enough so that a fork can slide easily through the center, they’re done. Drain and set aside.
From: https://www.teaforturmeric.com/easy-spinach-potato-curry-aloo-palak/