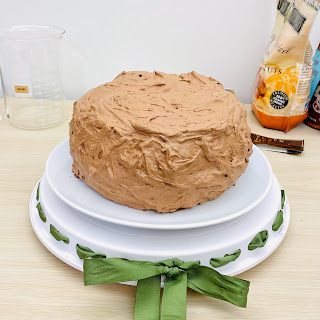
Showing posts with label Dessert. Show all posts

Tiramisu


Tiramisu
New: October 2022
INGREDIENTS
Yield: 6 to 8 servings
For the Cream
4
large egg yolks
½
cup/100 grams granulated sugar, divided
¾
cup heavy cream
1
cup/227 grams mascarpone (8 ounces)
For the Assembly

cups good espresso or very strong coffee
2
tablespoons rum or cognac
2
tablespoons unsweetened cocoa powder
About 24 ladyfingers (from one 7-ounce/200-gram package)
1 to 2
ounces bittersweet chocolate, for shaving (optional)


PREPARATION
Step 1
Using an electric mixer in a medium bowl, whip together egg yolks and ¼ cup/50 grams sugar until very pale yellow and about tripled in volume. A slight ribbon should fall from the beaters (or whisk attachment) when lifted from the bowl. Transfer mixture to a large bowl, wiping out the medium bowl used to whip the yolks and set aside.
Step 2
In the medium bowl, whip cream and remaining ¼ cup/50 grams sugar until it creates soft-medium peaks. Add mascarpone and continue to whip until it creates a soft, spreadable mixture with medium peaks. Gently fold the mascarpone mixture into the sweetened egg yolks until combined.
Step 3
Combine espresso and rum in a shallow bowl and set aside.
Step 4
Using a sifter, dust the bottom of a 2-quart baking dish (an 8x8-inch dish, or a 9-inch round cake pan would also work here) with 1 tablespoon cocoa powder.
Step 5
Working one at a time, quickly dip each ladyfinger into the espresso mixture -- they are quite porous and will fall apart if left in the liquid too long -- and place them rounded side up at the bottom of the baking dish. Repeat, using half the ladyfingers, until you’ve got an even layer, breaking the ladyfingers in half as needed to fill in any obvious gaps (a little space in between is O.K.). Spread half the mascarpone mixture onto the ladyfingers in one even layer. Repeat with remaining espresso-dipped ladyfingers and mascarpone mixture.
Step 6
Dust top layer with remaining tablespoon of cocoa powder. Top with shaved or finely grated chocolate, if desired.
Step 7
Cover with plastic wrap and let chill in the refrigerator for at least 4 hours (if you can wait 24 hours, all the better) before slicing or scooping to serve.
from: https://cooking.nytimes.com/recipes/1018684-classic-tiramisu

Funfetti Cake


Funfetti Cake
New: September 2022

This is a half recipe for 3x 6" cakes. Original full is for 3x 9" cakes.
Cook Time: 28-30 minutes

Ingredients

CAKE
1.5 + 1/4 + 1/8 cups (222g) cake flour
1/2 teaspoon baking powder
1/2 teaspoon baking soda
1/2 teaspoon salt (or no salt if using sales butter)
1/2 and 1/8 cups (1 stick + 2 TBS; 145g) unsalted butter, softened to room temperature
1/1 + 1/4 + 1/3 cups (175g) granulated sugar
1/6 cup (40 ml) vegetable oil
2 large eggs, at room temperature
1 large egg white, at room temperature
1.5 teaspoons (7 ml) pure vanilla extract
3/4 cups (190 ml) milk, at room temperature + 1 TBS of vinegar
3/8 cup (70 g) rainbow sprinkles (suggestion: betty crocker parlor perfect jimmies (NOT nonpareils)

VANILLA BUTTERCREAM
3/4 cups (1.5 sticks; 170g) unsalted butter, softened to room temperature
2/75 cups (325g) confectioners’ sugar
1/6 cup (40ml) heavy cream, at room temperature
1.5 teaspoons (7ml) pure vanilla extract (or use clear imitation vanilla extract for stark white frosting)
1/16 teaspoon salt
Additional sprinkles into frosting after frosting layers
Instructions

1. Preheat oven to 350°F (177°C). Butter and flour three 6-inch cake pans, line with parchment paper rounds, then grease the parchment paper. Suggestion: fit with wet cake strips.
2. Whisk the cake flour, baking powder, baking soda, and salt together in a large bowl. Set aside.
3. Using KitchenAid with a paddle attachment, beat the butter and sugar together on high speed for 5 minutes until completely creamed together and fluffy. 
4. Add vinegar to milk to make butter milk and stir.
5. Add the oil and beat for 1 minute until combined. 
6. Add the eggs, egg whites, and vanilla extract and beat on medium-high speed until combined.
7. Add dry ingredients and buttermilk in three additions, mixing after each addition just until incorporated. Do not over-mix this batter. The batter will be velvety and thick. 
8. Gently fold in the sprinkles. 
9. Pour and spread the batter evenly into each cake pan.
10. Bake for around 28–30 minutes or until the cakes are baked through. Tent the cakes with foil after about 15 minutes to prevent the sides and top from over-browning. To test for doneness, insert a toothpick into the center of the cake. If it comes out clean, it’s done.
11. Allow cakes to cool in the pans set on a wire rack for 20 minutes. Run a knife around the edges and then remove cakes from pans. Place cakes directly on wire racks to cool completely. The cakes must be completely cool before frosting and assembling.


Make the frosting: 
1. In a large bowl using a stand mixer fitted with a whisk or paddle attachment, beat the butter on medium speed until creamy, about 2 minutes. 
2. Add confectioners’ sugar, cream, vanilla extract, and salt. Beat on low speed for 30 seconds and then switch to high speed and beat for 2 minutes.  Add more confectioners’ sugar if frosting seems too thin; more cream if frosting is too thick; or an extra pinch of salt if frosting is too sweet.

Assemble cake + apply crumb coat: 
1. First, using a large serrated knife, slice a thin layer off the tops of the cakes to create a flat surface. Or use the cake slicer thing.
2. Place one cake layer on your cake stand or serving plate. Using a large icing spatula or small offset spatula, evenly cover the top with about 0.5 cup (about 125g) of frosting. Repeat with second cake layer, 0.5  more cup of frosting, and then the top cake layer. Spread a thin layer of frosting on the top and around the sides as a crumb coat. Run a bench scraper around the cake to smooth out crumb coat. 
3. Chill uncovered in the refrigerator for at least 30 minutes and up to 3 hours to set the crumb coat.
4. Mix sprinkles in frosting. Spread the remaining frosting all over the top and sides. Garnish with extra sprinkles, if desired.
5. Serve cake immediately, or if you need to store it for a few hours, place it in a cake carrier at room temperature for up to 4 hours. For longer storage, refrigerate covered cake for up to 1 day. Cake is best served at room temperature, though, so if it’s been refrigerated, let it sit out at room temperature for 30 minutes before serving.
Cover leftover cake tightly and store it in the refrigerator for 5 days.
Notes
Make Ahead & Freezing Instructions: The cake layers can be baked, cooled, and covered tightly at room temperature overnight. Likewise, the frosting can be prepared and then covered and refrigerated overnight. When ready to decorate, let the frosting sit at room temperature to slightly soften for 15 minutes, then give it one more mix with the mixer on medium speed for about 1 minute before frosting cake. (Add a splash of cream to thin out frosting if needed.) See step 10 if you want to store the frosted/decorated cake before serving it. Frosted cake or unfrosted cake layers can be frozen for up to 2–3 months. Thaw overnight in the refrigerator and bring to room temperature before decorating/serving. See how to freeze cakes for detailed instructions.

Eggs: 2 whole eggs provide structure, moisture, and richness. 1 extra egg whites keep the cake light. I don’t recommend using 3 whole eggs as a replacement; stick to the 2 eggs + 1 egg whites combination.
Buttermilk: If you don’t have buttermilk, you can make a DIY sour milk substitute. Add 1 Tablespoon of white vinegar or lemon juice to a liquid measuring cup. Then add enough whole milk to the same measuring cup until it reaches 1 and 1/2 cups. (In a pinch, lower-fat or nondairy milks work for this soured milk, but the cake won’t taste as moist or rich.) Stir it around and let sit for 5 minutes. The homemade “buttermilk” will be somewhat curdled and ready to use in the recipe.
Sprinkles: Avoid using sprinkles that will dye your batter. Steer clear from nonpareils, which are the little balls. The pictured cake uses Betty Crocker “Parlor Perfect” rainbow sprinkles, which I find in my regular grocery store. I also like to use these rainbow jimmies or pastel colored quins. Note that naturally colored sprinkles may lose their color in cake batter.
Originally from: https://sallysbakingaddiction.com/funfetti-layer-cake/


HEARD that this one is better:
https://mynameisyeh.com/mynameisyeh/2014/9/funfetti-cake

Grapefruit Cake


Grapefruit Yogurt Cake
Adapted loosely from Ina Garten

1 1/2 cups (190 grams) all-purpose flour
2 teaspoons baking powder
1/2 teaspoon kosher salt
1 cup (230 grams) plain whole-milk yogurt
1 cup (200 grams) plus 1 tablespoon (13 grams) sugar
3 extra-large eggs
1 tablespoon grated grapefruit zest (approximately one large grapefruit)
1/2 teaspoon pure vanilla extract
1/2 cup (120 ml) vegetable oil
1/3 cup (80 ml) freshly squeezed grapefruit juice

For the glaze:
1 cup (120 grams) confectioners’ sugar
2 tablespoons (30 ml) freshly squeezed grapefruit juice

Preheat the oven to 350°F. Grease an 8 1/2 by 4 1/4 by 2 1/2-inch loaf pan. Line the bottom with parchment paper. Grease and flour the pan.

Sift together the flour, baking powder, and salt into 1 bowl. In another bowl, whisk together the yogurt, 1 cup sugar, the eggs, grapefruit zest, and vanilla. Slowly whisk the dry ingredients into the wet ingredients. With a rubber spatula, fold the vegetable oil into the batter, making sure it’s all incorporated. Pour the batter into the prepared pan and bake for about 50 minutes, or until a cake tester placed in the center of the loaf comes out clean.

Meanwhile, cook the 1/3 cup grapefruit juice and remaining 1 tablespoon sugar in a small pan until the sugar dissolves and the mixture is clear. Set aside.

When the cake is done, allow it to cool in the pan for 10 minutes. Carefully place on a baking rack over a sheet pan. While the cake is still warm, pour the grapefruit-sugar mixture over the cake and allow it to soak in. Cool.

For the glaze, combine the confectioners’ sugar and grapefruit juice and pour over the cake.

Original from: https://smittenkitchen.com/2007/01/grapefruit-yogurt-cake/

Mille Feuille

Mille Feuille

New: November 2021


Ingredients

For the Pastry Cream

2 cups whole milk 473mL

1/2 vanilla bean split lengthwise

6 egg yolks

2/3 cup sugar 135g

1/4 cup cornstarch 37g

1 tbsp unsalted butter 15g, cold


For the Pastry

1 package frozen puff pastry (need to thaw in fridge for at least 2-3 hours)


For the Icing

3 cups powdered sugar

2 tsp vanilla

1/4 cup milk

1/4 cup cocoa powder


Instructions

For the Pastry Cream

Slice a vanilla bean down the middle and use a spoon to scrape out the seeds.

Transfer the milk and vanilla seeds to a medium pot and place over medium-high heat.

Bring to a boil whisking occasionally then immediately turn off the heat and set aside to infuse for 15 minutes.

In a bowl, whisk the sugar and corn starch together then add the egg yolks and whisk until light and fluffy.

Whisk in 1/4 cup of the hot milk mixture until incorporated. Whisk in the remaining hot milk mixture, reserving the saucepan.

Pour the mixture through a strainer back into the saucepan. Cook over medium-high heat, whisking constantly, until thickened and slowly boiling.

Remove from the heat and stir in the butter. Let cool slightly. 

Cover with plastic wrap, lightly pressing the plastic against the surface to prevent a skin from forming.

Chill at least 2 hours or until cooled.


For the Pastry Layers

Preheat oven to 400F.

Measure first! This recipe makes about 9 pastries so that means you need 27x rectangles

Roll out to about 1/16 an inch then use a knife or pizza cutter to cut 2x4 inch rectangles.

Line a baking sheet with parchment paper then place the first batch of rectangles about 2 inches apart. Place another sheet of parchment on top then cover with another baking sheet.

Bake for about 11 minutes rotating tray halfway through. Remove from oven and transfer to a wire rack to cool. Repeat process with 1/2 of the remaining sheet of puff pastry for the additional rectangles. You can clean up the edges with a sharp knife if desired.


For the Glaze

Add the powdered sugar to a large bowl then pour in the vanilla extract and 3 tablespoons of milk whisk together and add more milk as needed. You want a spreadable consistency but not a watery "flooding" consistency.

Transfer about 1/3 cup of the glaze to a different bowl and add the cocoa powder an another tablespoon of milk. Whisk together until smooth. Add more milk as needed so the chocolate glaze matches the vanilla glaze in consistency.

Transfer each batch of icing to a piping bag. You can use a small round tip like a #4 for the chocolate or just snip the tip off.


For the Assembly

Lay out 9 rectangles onto a wire rack over a piece of paper. Spread the vanilla icing onto each rectangle then pipe stripes of chocolate onto each one. Use a toothpick, skewer, or knife to create the chevron pattern by dragging the tool across the chocolate stripes in alternating directions. Set aside to set.

You can speed things up by arranging the tops in a grid where they're all touching then pipe the chocolate and create the chevrons.

Whip the cream and powdered sugar together until somewhat stiff peaks form. Whip the chilled pastry cream to break it up and smooth it out 

Pipe 8 dollops of pastry cream onto the first piece of puff pastry. Place another piece of pastry on top then pipe eight more dollops and add the top on. 


Originally from: https://preppykitchen.com/mille-feuille/

Yellow Cake & Chocolate Frosting


update october 2022 with better frosting


 Yellow Cake & Chocolate Frosting

New: September 2021

Double if you're using 8 inch rounds

For the Cake:
2 ¼ cups all-purpose flour 270g
1/4 cup corn starch 35g
1 1/4 cup granulated sugar 250g
2 tsp baking powder
1/2 tsp salt
1/2 cup unsalted butter room temperature, 113g
¼ cup vegetable oil 60mL
3 eggs room temperature, large
2 yolks
1 tbsp vanilla extract 15mL
1 cup buttermilk 240mL (instead use 1 c milk, 1 T vinegar)

For the Cake
  • Preheat oven to 350F. Butter and flour three 6 inch round pans. Whisk together the flour, baking powder, corn starch, and salt then set aside.
  • Cream butter and sugar in a stand mixer using a paddle attachment, or a large bowl if using an electric hand mixer. 
  • Add the oil and vanilla, mix to combine then scrape the bowl down. Add the eggs one at a time mixing until incorporated before adding the next. Scrape the bowl down once more and mix again. 
  • Add flour mixture and buttermilk to the butter in alternating batches while mixing on low.
  • Bake at 350F for about 30 minutes or until the centers are set and springy.
  • Allow to layers cool in pans for a few minutes then invert into a wire rack to cool completely.
New chocolate recipe

New: September 2022

1.5x (for 3x 8" cakes)

225g unsweetened cocoa, Dutch-process or natural
600 g confectioners' sugar, divided
1.5 t espresso powder (just use instant coffee powder)
340 g (1.5 c) heavy cream
3 sticks of butter
pinch of salt
3 t King Arthur Pure Vanilla Extract


.75x (for 3x 6" cakes)
112.5g unsweetened cocoa, Dutch-process or natural
300 g confectioners' sugar, divided
0.75 t espresso powder (just use instant coffee powder)
170 g (1.5 c) heavy cream
1.5 sticks of butter
small pinch of salt
1.5 t King Arthur Pure Vanilla Extract


Sift or sieve the cocoa, 1 1/2 cups (170g) confectioners' sugar and espresso powder into a bowl.

Bring the cream to a simmer on the stove or in the microwave, and whisk into the cocoa mixture.

At first the mixture will look grainy; continue whisking for a minute.

You'll see the lumps disappear as the sugar dissolves and the cocoa hydrates. Set aside to cool to room temperature.

Place the butter, salt, and 2 cups (227g) sifted or sieved confectioners' sugar in a large mixing bowl.

Beat until the mixture is smooth and fluffy. Beat in the vanilla.

With the mixer running on low speed, add the cocoa mixture a spoonful at a time until it's all incorporated. Scrape the bowl, then beat at medium speed for one minute more. Use to frost cake as needed.

Store frosting in an airtight container in the refrigerator for up to 5 days, or freeze for up to 6 months. Bring to cool room temperature before spreading or piping. (note it'll take like 5 hours to warm up)


Original
Makes 4.5 cups

1 3/4 cups (149g) unsweetened cocoa, Dutch-process or natural
3 1/2 cups (397g) confectioners' sugar, divided
1 teaspoon espresso powder, optional, for enhanced chocolate flavor
1 cup (227g) heavy cream, at room temperature
16 tablespoons (227g) unsalted butter, softened
1/8 teaspoon salt
2 teaspoons King Arthur Pure Vanilla Extract


Sift or sieve the cocoa, 1 1/2 cups (170g) confectioners' sugar and espresso powder into a bowl.

Bring the cream to a simmer on the stove or in the microwave, and whisk into the cocoa mixture.

At first the mixture will look grainy; continue whisking for a minute.

You'll see the lumps disappear as the sugar dissolves and the cocoa hydrates. Set aside to cool to room temperature.

Place the butter, salt, and 2 cups (227g) sifted or sieved confectioners' sugar in a large mixing bowl.

Beat until the mixture is smooth and fluffy. Beat in the vanilla.

With the mixer running on low speed, add the cocoa mixture a spoonful at a time until it's all incorporated. Scrape the bowl, then beat at medium speed for one minute more. Use to frost cake as needed.

Store frosting in an airtight container in the refrigerator for up to 5 days, or freeze for up to 6 months. Bring to cool room temperature before spreading or piping.


Instead of butter milk used milk + vinegar
Make less butter cream next time if you use the preppt recipe
https://preppykitchen.com/yellow-cake/#recipe

Emoji Cake

 Emoji Cake


Japanese Strawberry Cake

Japanese Strawberry Sponge Cake (Strawberry Shortcake)

Prep Time

40 mins

Cook Time

25 mins

Sponge Cake Cooling Time

1 hr

Total Time

2 hrs 5 mins


Japanese sponge cakes have in general lighter and softer texture than those I find in Australia, and possibly other Western countries. The texture is almost like my Cotton Cheesecake. The most popular sponge cake in Japan is by far the Strawberry Sponge Cake, aka Strawberry Shortcake.


Recipe Type: Dessert

Cuisine: Japanese

Keyword: japanese cake, sponge cake, strawberry cake


Serves: 8

Author: Yumiko


Ingredients (tbsp=15ml, cup=250ml)

Sponge Cake

125g / 4.4oz all-purpose flour sifted 3 times

100g / 3.5oz sugar (note 1)

4 eggs , yolks and whites separated

60g / 2.1oz butter , melted

Butter and flour to coat inside the cake pan

Decoration

18 strawberries (mid-size, note 2)

300ml / 0.6pt cream for whipping (note 3)

10g / 0.4oz sugar

Syrup (optional, note 4)

40ml / 1.4oz water

10g / 0.4oz sugar

Instructions

Pre-heat oven to 180°C / 356°F.


Coat the inside of an 18cm / 7" cake tin (note 5) with butter, dust with flour, then shake off the excess flour.


Put the egg yolks in a bowl, add ⅔ of the sugar and beat the egg yolks until they become whitish and thick. Draw a ribbon with the whisk and if the ribbon disappears slowly, it is ready.


In a separate bowl, beat the egg white. When the small bubbles form and the volume of the egg white doubles, add the remaining sugar in 2-3 batches and beat further to make meringue.


When the meringue becomes firm and it can form a peak when you lift the whisk (see the step-by-step photo in the post), it is ready.


Put the flour through the sifter and add to the egg yolk. Fold the batter with a spatula.


Transfer ⅓ of the meringue to the batter and mix with a whisk until the batter becomes smooth.


Add the remaining meringue to the batter in 2-3 batches and fold.

Pour the melted butter into the batter and fold several times. It's OK even if the butter is not completely mixed.


Pour the batter into the cake tin. Drop the tin onto the work bench to settle the batter in the tin, then, cook in the oven for 25 minutes. Insert a thin bamboo skewer in the centre of the cake to see if the skewer comes out dry. If the skewer is a bit wet, cook further 5 minutes.


Take the tin out of the oven and drop the tin onto the work bench. Remove the cake from the tin and let it cool completely on a rack, upside down (bottom side up).


Decorating the cake (do the steps 1 and 2 while cooling the sponge cake)

Put the Syrup ingredients in a small saucepan and bring it to a boil. When the sugar dissolved, turn the heat off.


Whip the cream until soft peak forms. Wipe the strawberries with a wet kitchen paper, remove the stems and halve 10 strawberries.


Leave the sponge cake upside down as is and slice it horizontally in half (note 6), remove the top half and place it next to the bottom half of the cake, cut side up.


Using a brush, coat the cut surface of the two sponge cakes with the syrup gently.


Drop about 3 heaped tablespoons of the whipped cream on the bottom half of the sliced cake and spread it to cover the entire surface. Fill the surface with the halved strawberries, without a gap as much as possible.


Drop about 4 heaped tablespoons of the whipped cream on and spread it to cover the strawberries and the round edge.


Place the top half of the cake on it, syrup side down. Gently press down, making sure the top and bottom cakes are aligned. Fill the gap around the strawberry filling on the side with whipped cream.


(optional) Thinly coat the top and the side of the cake with whipped cream. It is OK not to completely cover the sponge. Leave the cake in the fridge for 10 minutes (note 7).


Using a cake spatula or a long flat spatula, fully cover the top and the side of the cake with the remaining whipped cream, leaving some (about minimum of 4-5 tablespoons) for piping.


Put the remaining cream in a piping bag with a round nozzle. Squeeze out the cream to make a mound of cream in 8 positions around the edge of the surface. Place a strawberry on each mound.


Recipe Notes

1. My cake is not too sweet. If you prefer it sweeter, increase the quantity of sugar up to 125g / 4.4oz.


2. My 18 strawberries weighed about 450 / 1lb. I used halved strawberries as fillings but if you slice them, you can reduce the number of strawberries.


Instead of strawberries, you can use other berries to make it a mixed berry shortcake (see the photo in the post), or different fruits such as sliced peaches, kiwifruits, pineapples, oranges, grapes, or all of these mixed together!


3. Amount of whipped cream varies depending on the size of the cake tin, how tall your cake is and how much cream you put on the cake.


4. I did not use it but you can add a small amount (½ teaspoon) of liquor of you choice if you want.


5. I tried with a springform cake tin as well as a non-springform tin. The springform tin leaves a dent at the bottom of the cake when cooked so, I prefer a non-springform tin. There is no problem removing the baked cake out of the non-springform tin.


The size of the tin can be up to 21cm / 8". Any larger than that will make the cake thin, and it will not be easy to slice into two layers.


6. The easiest way to slice the round cake horizontally is to make a shallow cut around the side of the cake first, then slide the knife deeper into the centre ensuring that the blade traces the initial cut.


7. This will make the remaining whipped cream stick easier, particularly on the side.


8. My method of making a sponge cake is to beat the egg yolks and whites separately. There is another method of making the batter by beating whole eggs. If you want to use this method, here are the steps to replace the steps 3-9 in my recipe:

1) Put the eggs in a bowl, mix, then add sugar. Beat the eggs over a 60°C / 140°F water bath.

2) When the egg mixture is warmed up to around body temperature, remove the bowl from the water bath.

3) Continue to beat until the egg mixture cools down and becomes thick whitish batter. When you draw a ribbon with the whisk, the trace of the ribbon should slowly disappear.

4) Add the flour through a sifter to the batter and fold it in with a spatula. Add butter and fold several times.


9. You should consume the cake within 2 days. Although the sponge cake will keep longer, the flavour of the strawberries and cream start degrading on 3rd day.


10. Nutrition per serving.


serving: 146g calories: 346kcal fat: 22g (34%) saturated fat: 13g (65%) trans fat: 0.7g polyunsaturated fat: 1.4g monounsaturated fat: 6g cholesterol: 152mg (51%) sodium: 95mg (4%) potassium: 151mg (4%) carbohydrates: 31g (10%) dietary fibre: 1.2g (5%) sugar: 18g protein: 6.2g vitamin a: 18% vitamin c: 40% calcium: 3.8% iron: 7.6%


Originally from: https://japan.recipetineats.com/japanese-strawberry-sponge-cake-strawberry-shortcake/

Rhubarb Galette


Rhubarb Galette 


Julia Child? Can't remember recipe, but it used almond flour

Crustless Pumpkin Pie Bites


Crustless Pumpkin Pie Bites
New: October 2019

Makes ~12.  It doesn't expand a lot, so you can really fill the top of the muffin tins.

INGREDIENTS
2 large eggs
3/4 cup granulated sugar
1 teaspoon ground cinnamon
1/2 teaspoon salt
1/2 teaspoon ground ginger
1/4 teaspoon ground cloves
1 t vanilla extract
1 can (15 oz.) LIBBY'S® 100% Pure Pumpkin
1 can (12 fl. oz.) NESTLÉ® CARNATION® Evaporated Milk
Whipped cream, (optional)


INSTRUCTIONS
Preheat oven to 425 ˚C and  cupcake tray with paper liners.

BEAT 2 eggs lightly, add 3/4 c of white sugar and continue beating until light. Add 1 t cinnamon, 1 t vanilla extract, 0.5 t sal, ginger, cloves (and extra pumpkin pie spice or cardamom or nutmeg if desired).

Slowly add in evaporated milk and finally pumpkin and stir until everything is well mixed.

Spoon into muffin tray.

BAKE for about 5 minutes at 425, then turn down to 350 and bake for another 20 min or so, honestly there's a huge margin of error so do whatever.

COOL slowly down slowly (e.g. not the fridge) otherwise they'll crack.

Snowballs

aka Russian Tea Cakes
aka Mexican Wedding Cookies

Ingredients
1 cup butter (warm and gooey but not melted)
1 teaspoon vanilla extract (can use almond extract too or a mix)
6 tablespoons confectioners' sugar

2 cups all-purpose flour
1 cup chopped walnuts (small chopped)
1/3 cup confectioners' sugar for decoration

Directions
Preheat oven to 350 degrees F (175 degrees C).

1. In a medium bowl, cream butter and vanilla until smooth. Combine the 6 tablespoons confectioners' sugar and flour; stir into the butter mixture until just blended.

2. Mix in the chopped walnuts. If too dry add milk or water.

3. Roll dough into 1 inch balls, and place them 2 inches apart on an ungreased cookie sheet.

4. Bake for 12 minutes in the preheated oven.

4. When still warm roll in confectioner's sugar. When cool, roll in remaining confectioners' sugar again.

Adapted from: http://allrecipes.com/recipe/10192/russian-tea-cakes-i/?internalSource=hub%20recipe&referringContentType=search%20results&clickId=cardslot%201

Crème Anglaise


Crème Anglaise
New: December 2017

YIELD Makes 1 cup (enough for two individual chocolate souffles)

INGREDIENTS
1/2 cup whole milk
1/2 cup whipping cream
1 2-inch piece vanilla bean, split
3 large egg yolks
3 tablespoons sugar

PREPARATION
Combine milk and cream in heavy medium saucepan. Scrape in seeds from vanilla bean; add bean. Bring milk mixture to simmer. Remove from heat.
Whisk egg yolks and sugar in medium bowl to blend. Gradually whisk hot milk mixture into yolk mixture. Return custard to saucepan. Stir over low heat until custard thickens and leaves path on back of spoon when finger is drawn across, about 5 minutes (do not boil). Strain sauce into bowl. Cover and chill. (Can be made 1 day ahead.)

From: https://www.epicurious.com/recipes/food/views/creme-anglaise-4984#

Chocolate Souffles


Chocolate Souffles (for two)

New: December 2017
From: http://www.crunchycreamysweet.com/2013/02/14/finale-chocolate-souffles-for-two-and-le-creuset-giveaway/


Ingredients
3 Tbsp unsalted butter
2 Tbsp unsweetened cocoa powder
3 oz semi-sweet chocolate (used one bar of Theo's 85% dark)
1/2 tsp vanilla extract
2 egg yolks
2 egg whites
2 Tbsp granulated sugar
dash of salt
dash of cream of tartar

Make with 1 cup of creme anglaise
INGREDIENTS for creme anglaise
1/2 cup whole milk
1/2 cup whipping cream
1 2-inch piece vanilla bean, split
3 large egg yolks
3 tablespoons sugar


Instructions
1. Preheat oven to 375 degrees F.
2. Use 1 tablespoon of butter to grease your cocottes. Sprinkle them with sugar, tapping off the excess. Place cocottes on a baking dish and set aside.

3. In a double boiler, melt chocolate bar and powder with the remaining butter. Whisk smooth.
4. Set aside to come to room temperature. Add egg yolks, one at a time and whisk well. Then add vanilla.

5. In a clean bowl of your stand mixer, with a clean whisk, beat egg whites with a dash of salt, cream of tartar and sugar on medium speed until frothy. Increase the speed to high and beat until stiff peaks form. Do not over beat. Keep checking the peaks. As soon as you see the stiff peaks form, stop.

6. Add 1/3 of the meringue into chocolate mixture. Gently fold in. Add the remaining meringue and fold in until no streaks remain. Do not over fold.
7. Spoon the mixture into prepared cocottes. At this point you can cover the dishes and refrigerate the souffles until ready to bake.
8. Place in the oven and bake for 20 minutes.
9. Sprinkle with powdered sugar and serve immediately.

Recipe Notes
It is crucial to beat the egg whites in a clean bowl with a clean whisk. There can be no traces of grease or the meringue won't form. Bake the souffles right before you are ready to serve the dessert for the maximum impression.


PREPARATION
Combine milk and cream in heavy medium saucepan. Scrape in seeds from vanilla bean; add bean. Bring milk mixture to simmer. Remove from heat.
Whisk egg yolks and sugar in medium bowl to blend. Gradually whisk hot milk mixture into yolk mixture. Return custard to saucepan. Stir over low heat until custard thickens and leaves path on back of spoon when finger is drawn across, about 5 minutes (do not boil). Strain sauce into bowl. Cover and chill. (Can be made 1 day ahead.)

From: https://www.epicurious.com/recipes/food/views/creme-anglaise-4984#

Ultimate Cheesecake

"Ultimate" Cheesecake

New: May 2017

Ingredients

Crust:
  2 cups finely ground graham crackers (about 30 squares)
  1/2 teaspoon ground cinnamon
  1 stick unsalted butter,melted

Filling:
  1 pound cream cheese, two 8-ounce blocks, softened
  3 eggs
  1 cup sugar
  1 pint sour cream
  1 lemon,zested
  1 dash vanilla extract

Warm Lemon Blueberries:
  1 pint blueberries
  1 lemon, zested and juiced
  2 tablespoons sugar

Total: 5 hr
Active: 45 min
Yield: 6 to 8 servings


Directions

Preheat the oven to 325 degrees F.

For the Crust:
In a mixing bowl, combine the ingredients with a fork until evenly moistened. Lightly coat the bottom and sides of an 8-inch springform pan with non-stick cooking spray.
Pour the crumbs into the pan and, using the bottom of a measuring cup or the smooth bottom of a glass, press the crumbs down into the base and 1-inch up the sides. Refrigerate for 5 minutes.

For the Filling:
In the bowl of an electric mixer, beat the cream cheese on low speed for 1 minute until smooth and free of any lumps. Add the eggs, 1 at a time, and continue to beat slowly until combined. Gradually add sugar and beat until creamy, for 1 to 2 minutes.
Add sour cream, lemon zest, and vanilla. Periodically scrape down the sides of the bowl and the beaters. The batter should be well-mixed but not over-beaten. Pour the filling into the crust-lined pan and smooth the top with a spatula.
Set the cheesecake pan on a large piece of aluminum foil and fold up the sides around it. Place the cake pan in a large roasting pan. Pour boiling water into the roasting pan until the water is about halfway up the sides of the cheesecake pan; the foil will keep the water from seeping into the cheesecake. Bake for 45 minutes (ACTUALLY bake for 1 hr to 1 hr 15 min). The cheesecake should still jiggle just a tiny bit in the center (it will firm up after chilling). Let cool oven with open door for 30 minutes. Then let cool until rt on countertop. Chill in the refrigerator, loosely covered, for at least 4 hours. Loosen the cheesecake from the sides of the pan by running a thin metal spatula around the inside rim. Unmold and transfer to a cake plate. Using a spatula spread a layer of Warm Lemon Blueberry topping over the surface.

Warm Lemon Blueberries:
In a small saucepan add all the ingredients and simmer over medium heat for 5 minutes or so until the fruit begins to break down slightly. Leave to cool before spreading on cheesecake.


from: http://www.foodnetwork.com/recipes/tyler-florence/the-ultimate-cheesecake-recipe

Olive Oil Cake


EVO and Yogurt Loaf Cake
New: May 2016

Makes 8 servings
1 1/2 cups all-purpose flour
2 teaspoons baking powder
Pinch of salt
1 cup sugar
Finely grated zest of 1 lime
1/2 cup plain whole milk yogurt
3 large eggs
1/4 teaspoon pure vanilla extract
1/2 cup evo (extra-virgin olive oil)
Getting ready: Center a rack in the oven and preheat the oven to 350 degrees F. Generously butter an 8 1/2-x-4 1/2-inch loaf pan, place the pan on a lined baking sheet and set aside. Whisk together the flour, baking powder and salt and keep near by.
Put the sugar and zest in a medium bowl and rub the ingredients together until the sugar is fragrant. Whisk in the yogurt, eggs and vanilla. When the mixture is well blended, gently whisk in the dry ingredients. Switch to a spatula and fold in the oil. The batter will be thick and shiny. Scrape it into the pan and smooth the top.
Bake the cake for 50 to 55 minutes, or until it is golden and starts to come away from the sides of the pan; a knife inserted into the center of the cake will come out clean. Cool on a rack for 5 minutes, then run a knife between the cake and the sides of the pan. Unmold and cool to room temperature right-side up.
Storing: You can keep the cake at room temperature for at least 4 days or freeze it for up to 2 months


from: http://doriegreenspan.com/2008/01/baking-with-dorie-evo-and-yogurt-cake.html

Lemon Cake with Lemon Filling and Lemon Butter Frosting

Recipe By:ANELA
"This is a wonderful Easter cake. Everyone at my Easter barbeque loved it. Very moist and delightful."
Ingredients
2 cups all-purpose flour
2 teaspoons baking powder
1 teaspoon salt
1/2 cup butter
1 1/4 cups white sugar
3 eggs
1 teaspoon vanilla extract
1 cup milk
1 tablespoon grated lemon zest
1/2 cup fresh lemon juice

1 tablespoon cornstarch
6 tablespoons butter
3/4 cup white sugar
4 egg yolks, beaten
4 cups confectioners' sugar
1/2 cup butter, softened
2 tablespoons fresh lemon juice
1 teaspoon grated lemon zest
2 tablespoons milk

Directions
Preheat oven to 350 degrees F (175 degrees C). Grease and flour two 8 inch round pans. Mix together the flour, baking powder and salt. Set aside.

In a large bowl, cream together the butter and sugar until light and fluffy, about 5 minutes. Beat in the eggs one at a time, then stir in the vanilla. Beat in the flour mixture alternately with the milk, mixing just until incorporated.

Pour batter into prepared pans. Bake in the preheated oven for 30 minutes, or until a toothpick inserted into the center of the cake comes out clean. Allow to cool in pans on wire racks for 10 minutes. Then invert onto wire racks to cool completely.To make filling:

In medium saucepan, mix together 1 tablespoon lemon zest, 1/2 cup lemon juice and 1 tablespoon cornstarch until smooth. Mix in 6 tablespoons butter and 3/4 cup sugar, and bring mixture to boil over medium heat. Boil for one minute, stirring constantly. In small bowl, with a wire whisk, beat egg yolks until smooth. Whisk in a small amount of the hot lemon mixture. Pour the egg mixture into the sauce pan, beating the hot lemon mixture rapidly. Reduce heat to low; cook, stirring constantly, 5 minutes, or until thick (not to boil).

Pour mixture into medium bowl. Press plastic wrap onto surface to keep skin from forming as it cools. Cool to room temperature. Refrigerate 3 hours.

To make frosting: In large bowl, beat confectioners' sugar, 1/2 cup butter, 2 tablespoons lemon juice and 1 teaspoon lemon zest until smooth. Beat in milk, and increase speed and continue to beat until light and fluffy.

To assemble: With long serrated knife, split each cake layer in half horizontally, making 4 layers. Place 1 layer, cut side up, on a serving plate. Spread with half of the lemon filling. Top with another layer, and spread with 1/2 cup frosting. Add third layer, and spread with remaining half of the lemon filling. Press on final cake layer, and frost top and sides of cake with remaining frosting. Refrigerate cake until serving time.

http://allrecipes.com/recipe/20999/lemon-cake-with-lemon-filling-and-lemon-butter-frosting/print/?recipeType=Recipe&servings=12

Eclair Vanille


From the Ladurée cookbook.

New: January 2016

Link: http://www.insanitytheory.net/kitchenwench/laduree-vanilla-eclairs/

Tarte Tatin


Do not use Granny Smith
Opal ok to use


Tarte Tatin

Transcribed by Chér bc it’s so cute!

Pâte Sablée
100 g butter [~7 T]
100 g sugar [0.5 c]
250 g flour [2 cups]
5g salt [a dash]
1 egg

“Stuffing”
6-7 Yellow Delicious apples
100g sugar [0.5c]
100g butter [~7 T]
Cinamon

In a pan, melt the butter [and sugar and cinnamon] and then add the pealed [quartered] and cut apples
Add sugar and cinamon  and let cook until the sugar has carmalized a bit in between the apples (~30 min with reduced heat).

Spread the crust to reach a thickness of 4 mm. Place it on top of the apples and fit the edges in between the apples and the pan.
Poke a few times with a knife and put in the oven already hot (400 ˚F)
Let cook until the crust is done, cover with an aluminum foil, reduce the heat and cook an extra 10 min.
Wait until the temperature drops a bit (outside the oven) and flip the tarte onto an another pan over the sink.
Be carefull to the hot carmel that can spill.


Walnut Pie


For the crust:


2 cups unbleached all purpose flour

1/3 cup sugar
1 teaspoon salt
1 cup (2 sticks) chilled unsalted butter, cut into 1/2-inch pieces
3 large egg yolks, beaten to blend

Mix first 4 ingredients in large bowl. Add butter; rub in with fingertips until mixture resembles coarse meal. Add yolks; mix with fork until dough begins to clump together. Shape dough into 6 balls for Walnut Tartlets, 2 balls for Apple Galette or 1 ball for Apricot Tart. Flatten ball(s) into disk(s); wrap in plastic. Chill 30 minutes. (Can be made 2 days ahead. Keep chilled. Let dough soften slightly at room temperature before rolling out.)


For the filling

400g shelled walnuts, halved
1 tbsp walnut oil
250g caster sugar
125ml water
6tbsp thick honey
4 tbsp crème fraiche, plus extra to serve
(Can use less of everything except the walnuts as always have leftover syrup)

Put the sugar and water in a heavy-based saucepan over medium heat to dissolve the sugar, then increase the heat and allow the sugar syrup to caramelise until amber coloured.

Remove from the heat, and add the honey and crème fraiche. Mix well with a wooden spoon and stir in the nuts. They should be evenly coated. If the syrup starts to set, just place the pan back over the heat and stir.
Spread the walnut filling in the pastry case and allow to cool at room temperature.

From Epicurious

Tarte Aux Fraises


New: April 2015

Tarte Aux Fraises
Fresh Strawberry Tart
Recipe by Julia Child
Source: Mastering the Art of French Cooking; Volume I
(& http://sugarandspice-celeste.blogspot.com/2009/06/fresh-strawberry-tart-from-julia-child.html)

Ingredients:
A 10-inch fully baked pastry shell (see "Sugar Crust" recipe below)
1 quart large, ripe, handsome strawberries
1 cup red currant jelly (apricot jelly can be substituted if you have trouble finding red currant)
2 tbsp. granulated sugar
2 tbsp. kirsch or cognac (I used Frangelico hazelnut liqueur)
1 1/2 to 2 cups chilled creme patissiere (custard filling...recipe below)

Directions:
Hull the strawberries. If necessary to wash them, do so very quickly, and drain them on a rack.

Boil the currant jelly, sugar, and liqueur in a small saucepan until last drops from spoon are sticky. Paint the interior of the shell with a thin coating of the glaze and allow to set for 5 minutes. This will give the shell a light waterproofing. Reserve the rest of the glaze for the strawberries. Warm it briefly if it has hardened.
Spread a 1/2-inch layer of creme patissiere in the bottom of the pastry shell.

Arrange a design of strawberries over the cream. Put the largest strawberry in the center, and graduate down in size, placing the berries closely together, their stem ends in the cream. Spoon or paint over them a thin coating of the glaze, and the tart is ready to serve. Because of the glazed waterproofing in the bottom of the shell, the filled tart may wait an hour or so.

Sugar Crust
"Pate Sablee"
Ingredients:
1 1/3 cups flour
3 to 7 tbsp. granulated sugar
1/8 tsp. double-action baking powder
7 tbsp. fat: 5 tbsp chilled butter and 2 tbsp. chilled vegetable shortening
1 egg beaten with 1 tsp. water
1/2 tsp. vanilla extract

Directions:
Place the flour, sugar, butter, vegetable shortening, and baking powder in the mixing bowl. Rub the fat and dry ingredients together rapidly with the tips of your fingers until the fat is broken into bits the size of small oatmeal flakes. Blend in the egg and vanilla, and knead the dough rapidly into a ball. Place on a pastry board and with the heel of your head, not the palm, rapidly press the pastry by two-spoonful bits down on the board and away from you in a firm, quick smear of about 6 inches. The dough will be quite sticky if you have used the full amount of sugar. Form again into a ball, wrap in waxed paper, and chill for several hours until firm.

roll out, put in 10" tarte pan, Bake in preheated 375 degree ovenfor 8-10 minutes, or until lightly golden

Creme Patissiere
(Custard Filling)
Ingredients:
1 cup granulated sugar
5 egg yolks
1/2 cup flour
2 cups boiling milk
1 tbsp. butter
1 1/2 tbsp. vanilla extract

Directions:
Gradually beat the sugar into the egg yolks and continue beating for 2 to 3 minutes until the mixture is pale yellow and forms "the ribbon".

Beat in the flour.

Beating the yolk mixture, gradually pour on the boiling milk in a thin stream of droplets.

Pour into saucepan and set over moderately high heat. Stir with a wire whip, reaching all over bottom of the pan. As sauce comes to a boil it will get lumpy, but will smooth out as you beat it. When boil is reached, beat over moderately low heat for 2 to 3 minutes to cook the flour. Be careful custard does not scorch in bottom of pan.

Remove from heat and beat in the butter, then vanilla extract. If the custard is not used immediately, clean it off the sides of the pan, and dot top of custard with softened butter to prevent a skin from forming over the surface. Creme Patissiere will keep for a week under refrigeration, or may be frozen.
Blogger Template by Clairvo