
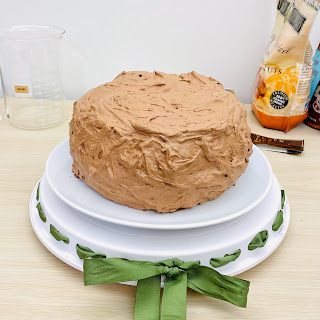
Yellow Cake & Chocolate Frosting
New: September 2021
Double if you're using 8 inch rounds
For the Cake:
2 ¼ cups all-purpose flour 270g
1/4 cup corn starch 35g
1 1/4 cup granulated sugar 250g
2 tsp baking powder
1/2 tsp salt
1/2 cup unsalted butter room temperature, 113g
¼ cup vegetable oil 60mL
3 eggs room temperature, large
2 yolks
1 tbsp vanilla extract 15mL
1 cup buttermilk 240mL (instead use 1 c milk, 1 T vinegar)
For the Cake
- Preheat oven to 350F. Butter and flour three 6 inch round pans. Whisk together the flour, baking powder, corn starch, and salt then set aside.
- Cream butter and sugar in a stand mixer using a paddle attachment, or a large bowl if using an electric hand mixer.
- Add the oil and vanilla, mix to combine then scrape the bowl down. Add the eggs one at a time mixing until incorporated before adding the next. Scrape the bowl down once more and mix again.
- Add flour mixture and buttermilk to the butter in alternating batches while mixing on low.
- Bake at 350F for about 30 minutes or until the centers are set and springy.
- Allow to layers cool in pans for a few minutes then invert into a wire rack to cool completely.
New chocolate recipe
New: September 2022
1.5x (for 3x 8" cakes)
225g unsweetened cocoa, Dutch-process or natural
600 g confectioners' sugar, divided
1.5 t espresso powder (just use instant coffee powder)
340 g (1.5 c) heavy cream
3 sticks of butter
pinch of salt
3 t King Arthur Pure Vanilla Extract
.75x (for 3x 6" cakes)
112.5g unsweetened cocoa, Dutch-process or natural
300 g confectioners' sugar, divided
0.75 t espresso powder (just use instant coffee powder)
170 g (1.5 c) heavy cream
1.5 sticks of butter
small pinch of salt
1.5 t King Arthur Pure Vanilla Extract
Sift or sieve the cocoa, 1 1/2 cups (170g) confectioners' sugar and espresso powder into a bowl.
Bring the cream to a simmer on the stove or in the microwave, and whisk into the cocoa mixture.
At first the mixture will look grainy; continue whisking for a minute.
You'll see the lumps disappear as the sugar dissolves and the cocoa hydrates. Set aside to cool to room temperature.
Place the butter, salt, and 2 cups (227g) sifted or sieved confectioners' sugar in a large mixing bowl.
Beat until the mixture is smooth and fluffy. Beat in the vanilla.
With the mixer running on low speed, add the cocoa mixture a spoonful at a time until it's all incorporated. Scrape the bowl, then beat at medium speed for one minute more. Use to frost cake as needed.
Store frosting in an airtight container in the refrigerator for up to 5 days, or freeze for up to 6 months. Bring to cool room temperature before spreading or piping. (note it'll take like 5 hours to warm up)
Original
Makes 4.5 cups
1 3/4 cups (149g) unsweetened cocoa, Dutch-process or natural
3 1/2 cups (397g) confectioners' sugar, divided
1 teaspoon espresso powder, optional, for enhanced chocolate flavor
1 cup (227g) heavy cream, at room temperature
16 tablespoons (227g) unsalted butter, softened
1/8 teaspoon salt
2 teaspoons King Arthur Pure Vanilla Extract
Sift or sieve the cocoa, 1 1/2 cups (170g) confectioners' sugar and espresso powder into a bowl.
Bring the cream to a simmer on the stove or in the microwave, and whisk into the cocoa mixture.
At first the mixture will look grainy; continue whisking for a minute.
You'll see the lumps disappear as the sugar dissolves and the cocoa hydrates. Set aside to cool to room temperature.
Place the butter, salt, and 2 cups (227g) sifted or sieved confectioners' sugar in a large mixing bowl.
Beat until the mixture is smooth and fluffy. Beat in the vanilla.
With the mixer running on low speed, add the cocoa mixture a spoonful at a time until it's all incorporated. Scrape the bowl, then beat at medium speed for one minute more. Use to frost cake as needed.
Store frosting in an airtight container in the refrigerator for up to 5 days, or freeze for up to 6 months. Bring to cool room temperature before spreading or piping.
Instead of butter milk used milk + vinegar
Make less butter cream next time if you use the preppt recipe
https://preppykitchen.com/yellow-cake/#recipe


